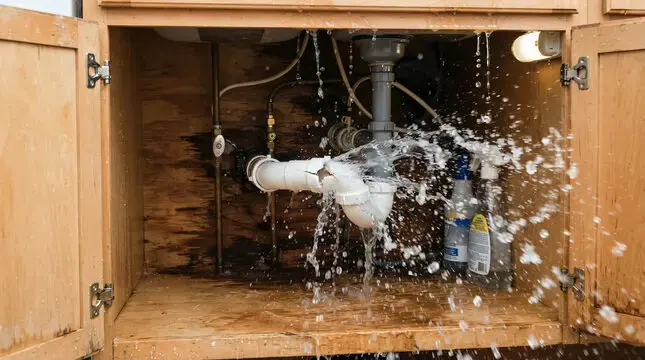
Not every water emergency comes with a loud crack. In newer Huntersville homes, a lot of damage starts as a small leak at a fitting or a hose connection that nobody can see.
Key takeaways
- Newer Huntersville homes commonly use PEX and CPVC supply pipes with fittings and push connectors, and a failing fitting can leak for a long time behind a wall.
- Washer and ice maker supply hoses are another frequent source, because they sit under pressure all day.
- The main shutoff stops a pipe leak, and the small valve at the appliance stops a hose leak.
- Signs of hidden water include a musty smell, soft baseboards, a swollen cabinet floor or a rising water bill.
- Wet cavities must be dried to readings, since water inside a wall does not evaporate on its own.
Where Huntersville homes tend to leak
Much of Huntersville was built in the 1990s through the 2010s, and the plumbing in those homes is mostly plastic. PEX and CPVC supply pipes are connected with fittings and push connectors.
These materials resist corrosion, so the weak spot is usually a joint. A fitting that was not seated fully, or one that has aged, can seep long before it fails outright.
Some homes from the 1980s to the mid 1990s carry polybutylene supply pipe, which is a different story that a plumber can identify.
- Push connectors at the water heater, a manifold or a transition.
- Crimp or clamp fittings behind a wall or in a joist bay.
- Toilet supply connections and sink shutoff valves.
- Hose connections to the washer and ice maker.
Washer and ice maker hoses
The hose behind a washing machine holds water pressure around the clock, even when the machine is not running. When that hose fails, it can release a lot of water in a short time.
An ice maker supply hose is smaller, but it can leak slowly behind a refrigerator for weeks. The water runs under the floor and into the cabinets.
Washer hoses
A bulging, cracked or rusty hose connection is a warning. Replacing a hose before it fails is far easier than drying a laundry room afterward.
- Turn the supply valves off when leaving the house for a long trip.
- Pull the machine out and look at the hose collars once a year.
- Replace any hose that bulges, kinks or shows white mineral crust at the ends.
Ice maker hoses
The hose sits where nobody looks, and a slow drip can run for a long time. Warped flooring near the refrigerator is often the first clue.
- Cabinet bases or hardwood near the refrigerator start to cup.
- A damp spot appears on the floor when the refrigerator is moved.
- The ice maker stops filling or the water pressure drops.
What to do when you find a leak
The right shutoff depends on what is leaking. Choose the closest valve first, and go to the main if the leak keeps running.
- Appliance hose: close the small valve at the wall behind the machine.
- Toilet or sink: close the angle stop under the fixture.
- Fitting in a wall or ceiling: close the main water valve and open a faucet to drain the pipe.
- Unplug or switch off anything near the water, and do not stand in it near an outlet.
- Photograph the source and the damage before cleaning up.
How hidden water shows itself
A leak inside a wall or under a cabinet does not announce itself. The signs build up over days or weeks, and by then the materials are often saturated.
- A musty smell in a laundry room, kitchen or closet.
- Baseboards or trim that swell, soften or separate from the wall.
- Paint that bubbles or drywall that feels cool and damp.
- A water bill that climbs with no change in use.
- A meter that keeps moving with every fixture off.
How the water is found and removed
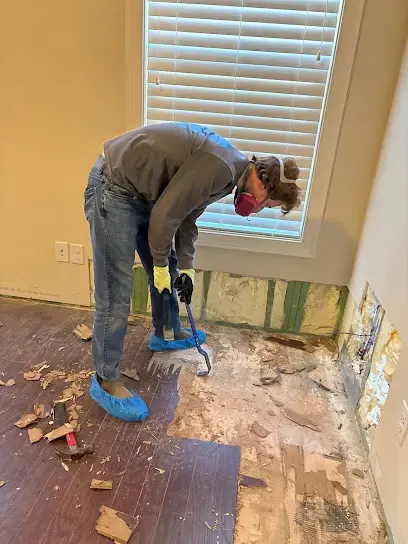
The restoration team starts with moisture meters and a thermal camera to map where the water traveled. The wall that shows a stain is rarely the only wet one.
A supply pipe leak cleanup usually opens the wall or cabinet near the source so the cavity can be reached and dried. For a hose failure at a washer or refrigerator, an appliance leak cleanup handles the floor, cabinets and adjoining rooms.
- Extraction: standing water on floors is removed first.
- Selective removal: wet baseboard, drywall or cabinet kick plates are cut out.
- Drying: air movers and dehumidifiers run until readings return to normal.
- Documentation: readings and photographs support the insurance claim.
What to tell the insurance company
Insurers look at how fast the leak was found and what was done to stop it. A gradual leak that went on for a long time can be treated differently from a sudden failure.
Describe what happened plainly, and give the dates when you first saw a sign.
- When the stain, smell or noise first appeared.
- What was shut off and when.
- What the plumber found and replaced.
- Photographs of the failed fitting or hose, kept if possible.
Drying behind walls and under cabinets
Wet framing and drywall can look dry on the surface while the cavity stays damp for days. Drying only the visible floor leaves the real problem in place.
Structural drying works from the inside out. Small holes or removed panels let dry air move through the cavity, and meters confirm when the framing is back to normal.
Because the climate is humid, a cavity that stays wet is an invitation for mold, so the drying has to finish before the wall is closed.
Preventing the next one
Most of these leaks give a hint before they fail. A short annual look at the fittings and hoses catches the common ones.
A plumber can check push connectors and fittings, and replace anything that is weeping or past its service life.
- Look under every sink and behind the toilet for damp spots or mineral crust.
- Check the water heater connections for drips.
- Replace washer and ice maker hoses on a regular schedule, rather than waiting for a failure.
- Know where the main shutoff is and make sure it turns.